Short answer: Sales Navigator can't export leads on its own, but a free Chrome extension can. It saves the leads in your lists to a CSV file that opens in Excel or Google Sheets, ready for your CRM or outreach. You can then enrich it with verified emails and phone numbers using Kipplo Enrich.
Tested on a real Sales Navigator account in October 2026.
What you need
- A Sales Navigator account and a lead or account list
- Google Chrome on a computer
- About 5 minutes to set up
- For emails and phone numbers: a free Kipplo trial (no credit card)
Can you export leads from Sales Navigator?
Not with LinkedIn's own tools. LinkedIn says so on its help page: "LinkedIn currently doesn't offer the option to export account and lead information." Here are your options:
Option | Cost | What you get | Catch |
|---|---|---|---|
Copy and paste | Free | Whatever you copy | Very slow for more than a few leads |
CRM sync | Advanced Plus plan | Links Sales Navigator to Salesforce, Dynamics or HubSpot, and lets you add leads as contacts one at a time | No CSV or bulk export, and only on the top plan |
Chrome extension | Free | A CSV of your list | No emails or phone numbers, but Kipplo Enrich can add them |
Kipplo shares a free extension for this, Sales Navigator List Export. It saves the leads already on your screen, page by page. Here's how to use it.
See it in action (about a minute)
Step 1: Save your leads to a list
The extension exports whole lists, but only one page of a search at a time. So if your leads are in a search, save them to a list first.
- Tick Select all at the top of the search results.
- Click Save to list and pick or create a list.
- Repeat on each page of results.
Tip: a list holds up to 1,000 leads. Have more? Here's how to split a big search.
Step 2: Install the free extension
The extension works only in LinkedIn Sales Navigator, on lead and account lists and searches. It doesn't work on regular LinkedIn pages.

Sales Navigator List Export
Save your Sales Navigator lists to a CSV file.
Free · No account needed · For educational and research use
- Unzip the file into a folder you'll keep, for example Documents. Deleting the folder removes the extension.
- Open chrome://extensions and switch on Developer mode (top right).
- Click Load unpacked and choose the unzipped folder.
- Pin the extension from Chrome's puzzle-piece menu.
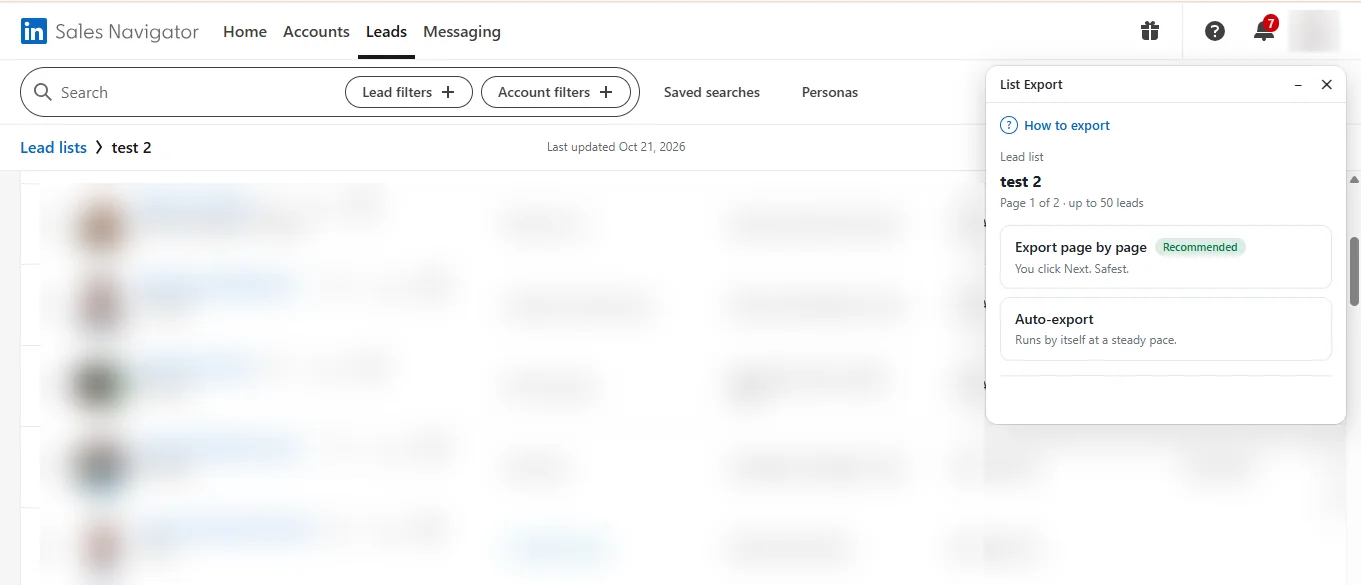
- Open your list in Sales Navigator and click the extension icon. A small box appears on the page (if it doesn't, refresh the tab and click the icon again).
The first time, the box asks you to confirm you'll use it responsibly.
What it can access: only Sales Navigator pages. It uses two Chrome permissions: storage (keeps your export on your computer) and idle (pauses when you step away).
Updates: new versions are posted on this page. Download the new file and replace the old folder.
Step 3: Choose how to export
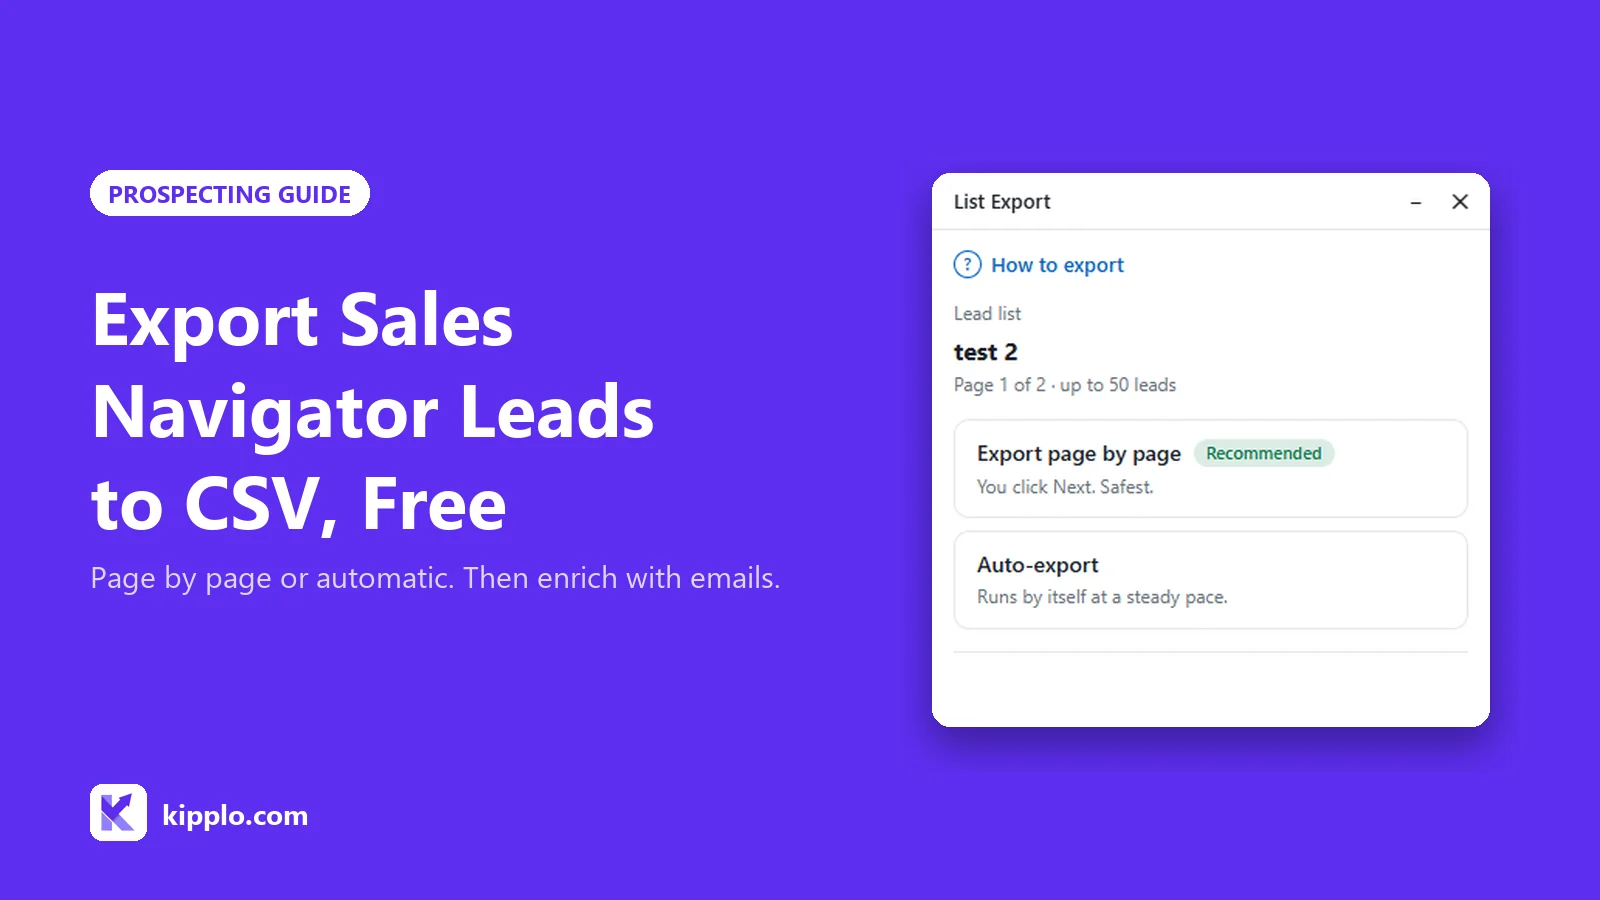
The box offers two ways to export. With either one, you first choose how many leads you want: the whole list or a set number.
Option A: Page by page (recommended)
You click through the list, and the extension saves every page you open. It's the most careful option.
- Click Export page by page, choose how many leads and click Start.
- Wait on the page for about 20 seconds, until the box shows "✓ Page 1 done".
- Click Next at the bottom of the Sales Navigator list. Each new page saves by itself.
- Keep going until the box says All done.
Option B: Auto-export
The extension moves through the list by itself and saves each page. Keep the Sales Navigator tab open until it finishes.
- Click Auto-export and choose how many leads. You'll see how long it will take before you start.
- Click Start auto-export.
- Keep the tab and the box open. The box counts down to the next page and shows how long is left.
Stop and continue at any time
Click Stop whenever you like. The bar then shows Continue, which picks up exactly where you stopped. You can also hand a page-by-page export over to auto-export halfway through.
Step 4: Download the CSV and open it in Excel or Google Sheets
When the export is done, click Download CSV. To save just one page, click Download next to it.
- Excel: double-click the file. Names with accents, such as José or Müller, show correctly.
- Google Sheets: choose File → Import → Upload and pick the file.
- Your CRM: HubSpot, Pipedrive and Salesforce all import a CSV directly.
What data can you export from Sales Navigator?
These are the exact columns in the CSV. A column is filled only when Sales Navigator shows that detail.
Lead lists and lead searches (9 columns)
Column | What's in it |
|---|---|
First name | First name, without titles such as "Dr." |
Last name | Last name, without credentials such as "MBA" or "PhD" |
Full name | The name exactly as Sales Navigator shows it |
Job title | Current job title |
Company | Current company (blank if the person doesn't list one) |
Location | Location as shown, for example city, region and country |
Sales Navigator URL | Link to the lead in Sales Navigator |
LinkedIn ID URL | Link to the LinkedIn profile, using the person's member ID (linkedin.com/in/ACwAA…) |
Company Sales Navigator URL | Link to the company in Sales Navigator, when the company is linked |
Tip: the LinkedIn ID URL opens the right profile when you're signed in to LinkedIn, and the address bar then shows their LinkedIn URL (linkedin.com/in/name).
Account lists and account searches (6 columns)
Column | What's in it |
|---|---|
Company | Company name |
Industry | Industry, as shown in Sales Navigator |
Location | Company location, when shown (blank for account searches) |
Employees | Headcount, for example "51-200 employees" |
Sales Navigator URL | Link to the account in Sales Navigator |
LinkedIn ID URL | Link to the company's LinkedIn page, using its ID number (linkedin.com/company/1234…) |
Not included: emails and phone numbers. The extension exports the profile and company details shown in Sales Navigator, not contact details. Here's how to add them.
How to export more than 2,500 leads from Sales Navigator
A search shows up to 2,500 results, and LinkedIn limits each list to 1,000 leads (LinkedIn Help). So break a big search into smaller ones:
- Narrow your search to under 1,000 results, for example by US state: California, Texas, New York.
- Save each one to its own list, like "California sales leaders".
- Export each list, then combine the files in Excel or Google Sheets.
- Remove duplicates using the Sales Navigator URL column (in Excel: Data → Remove duplicates).
Tip: you can save up to 10,000 leads in total. Hit the limit? Clear out lists you've already exported.
How to get emails and phone numbers for your Sales Navigator leads
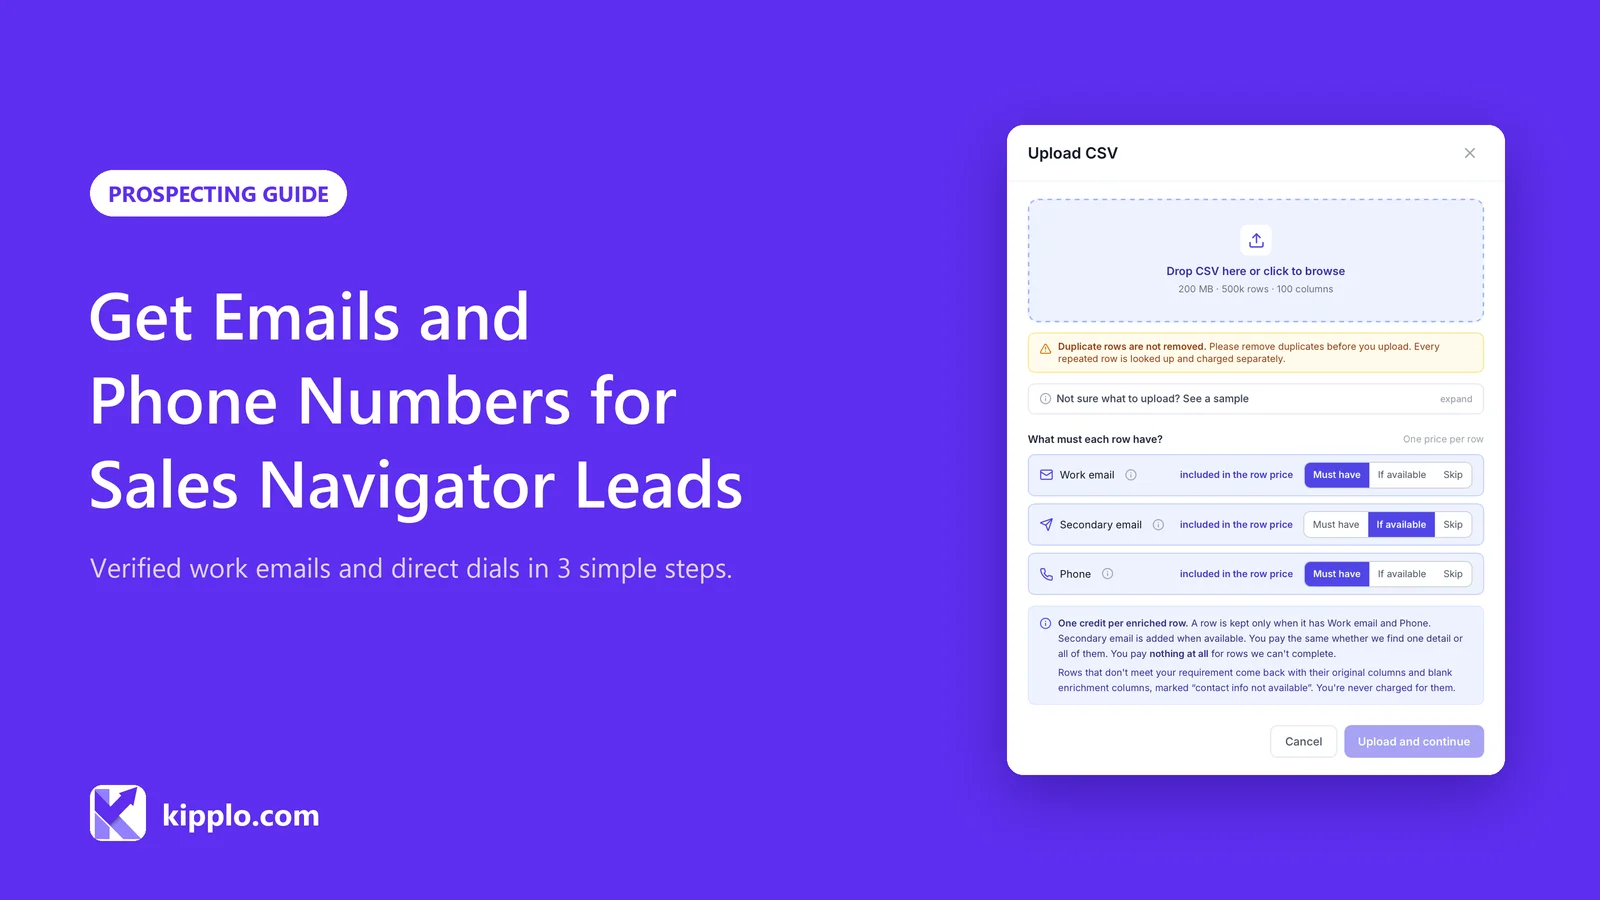
Kipplo Enrich matches each lead by name and company, and adds their work email, a second email and phone number.
- In Kipplo, open Enrich and click Upload CSV.
- Drop in the CSV you exported from Sales Navigator.
- Under "What must each row have?", choose Must have, If available or Skip for each detail.
- Click Upload and continue. You'll see how your columns are matched before any credits are used.
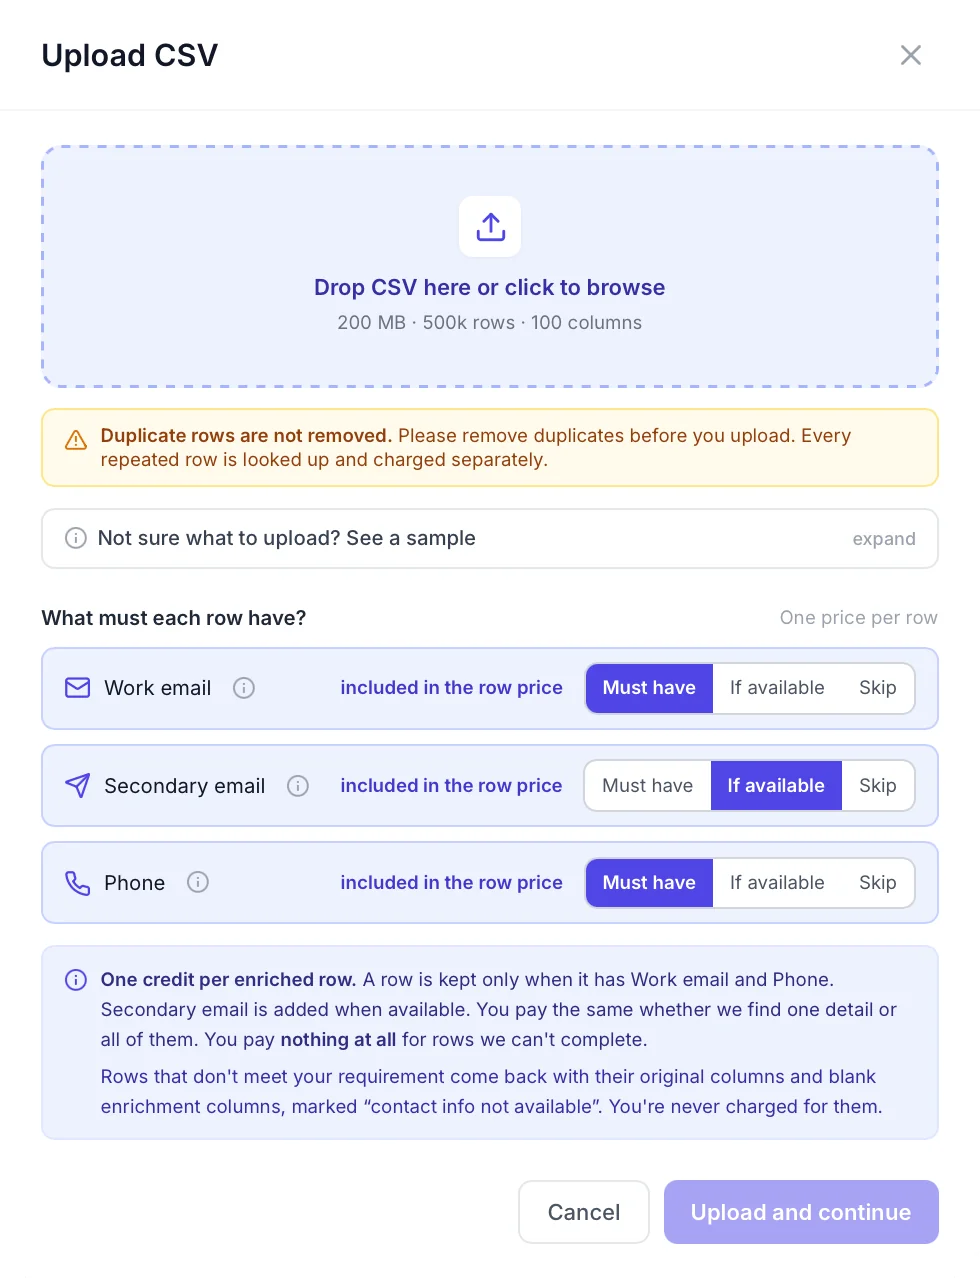
Each enriched row costs 1 credit, whether Kipplo finds one detail or all three. Rows it can't fill come back marked "contact info not available" and cost nothing.
Turn your Sales Navigator export into an email list
Start your free trial: no card needed →Is it safe to export leads from Sales Navigator?
We used the extension on our own Sales Navigator account while writing this guide, with no problems. It also has safety stops built in:
- Auto-export works at a steady pace: it waits about a minute between pages and takes a 15-minute break after every 500 leads.
- It pauses when you step away from your computer.
- If LinkedIn shows a warning or asks you to verify your account, it stops exports for 24 hours.
A few tips:
- Use page by page when you can.
- Export only the leads you need.
- Run one export at a time, in one tab.
Before you install: follow LinkedIn’s rules
Please read and always follow LinkedIn’s User Agreement.
Your exported leads stay on your computer. The extension doesn't need an account and doesn't use an external server.
Frequently asked questions
Is the extension free?
Yes. Sales Navigator List Export is completely free, and there's nothing to sign up for. You only need a Sales Navigator subscription. Adding emails and phone numbers is a separate step in Kipplo, which has a free trial.
How many leads can I export?
As many as your Sales Navigator lists hold. A list can hold up to 1,000 leads, and a search shows up to 2,500 results. The extension has no daily limit; it just takes a 15-minute break after every 500 leads with auto-export.
Can I export to Excel, Google Sheets or my CRM?
Yes. The extension gives you a CSV file, which opens in Excel and imports into Google Sheets, HubSpot, Salesforce and most other CRMs.
Does it include emails and phone numbers?
No. It exports the profile and company details shown in Sales Navigator, not contact details. Upload your CSV to Kipplo Enrich to add verified work emails and phone numbers, for 1 credit per row it fills.
What should I know before using it?
You’re accountable for how you use it. Always follow LinkedIn's User Agreement and privacy laws like GDPR. The extension isn’t connected to or endorsed by LinkedIn.
Is my data safe?
Your leads stay in your own browser until you download the CSV. The extension doesn't need an account and doesn't use an external server.